This post is a continuation of our AKS Basics series. If you followed post “AKS Basics: Creating AKS Cluster Using Portal” you must have an AKS cluster to work with. Now, it’s time to connect to this cluster. There are two quick ways of doing this. We will cover both.
Connect to AKS Cluster using cloud shell
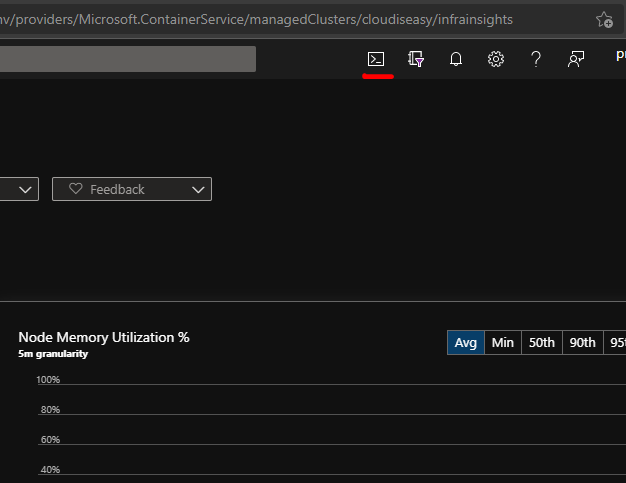
First, I’ll show you how to connect to AKS cluster using cloud shell. I am using Windows Terminal. You can use cloud shell from Azure Portal. Here’s screenshot of where you can find this option, if using portal.
I am using Windows Terminal and logged into my Azure account. Kubectl is already part of it and you don’t need to install it. If you manage multiple subscriptions, ensure that you’ve selected appropriate subscription. Use following command:
Note: You can skip this step. You can also send the subscription name or ID in the aks get-credentials as well.
az account set --subscription "<subscription_name>"Replace <subscription_name> with your subscription name. Double quotes are optional. However, if your subscription name has spaces, it is must to have them. Confirm if you’re connected to right account by running:
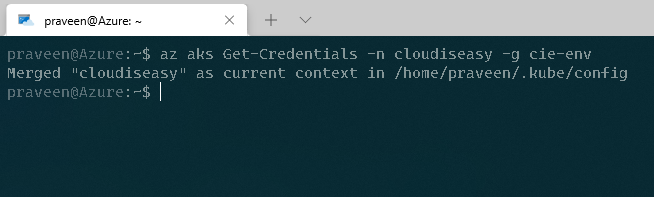
az account showOnce verified, run following command to connect to AKS cluster:
az aks Get-Credentials -n <aks_name> -g <rg_name> --overwrite-existing --admin- Replace <aks_name> with your AKS cluster name.
- Replace <rg_name> with your resource group name where you deployed the AKS cluster.
- –overwrite-existing is optional. This is useful if already have a context set for a Kubernetes cluster with same name.
- –admin is again totally and can be skipped. This is useful to get administrator credentials.
Once the command completes, you should see an output similar to mine:
Lets verify if we can run basic kubectl commands. Lets try to get nodes by running:
kubectl get nodes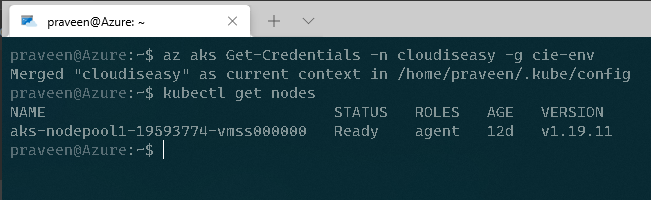
We see one node. Yes! I just have one node in my cluster.
Connect to AKS Cluster from your laptop/workstation
You need to install few components on your laptop before you could connect to AKS cluster.
Install AZ CLI
Ensure you have installed az cli. If you haven’t, run following PowerShell command:
Invoke-WebRequest -Uri https://aka.ms/installazurecliwindows -OutFile .\AzureCLI.msi; Start-Process msiexec.exe -Wait -ArgumentList '/I AzureCLI.msi /quiet'; rm .\AzureCLI.msiThis basically downloads required MSI file for az cli and installs it in silent mode. However, you can always do that manually by downloading the MSI file using URL in above command.
Install Kubectl
There are two ways: AZ CLI or manually installing kubectl.exe. For simlicity we will use AZ CLI command.
az aks install-cliVerify by check kubectl version using command:
kubectl version --clientConnect to AKS Cluster
Similar to cloud shell method, just run az aks get-credentials command to connect to your cluster. Then validate by getting the nodes. You should see output similar to below screenshot.

Next Steps
By now you should be having your own AKS cluster and able to connect to it. Next we will deploy a very simple application on the AKS cluster.
As usual, if you’re facing any issues please shoot them in comments. I’ll try to answer all.