This post is part of “AKS Basics” series. Under this series, we will cover various topics to get you started with real time Azure Kubernetes projects. It will contain everything from creating AKS clusters to monitoring them and automating end to end deployment process. In this article we will cover how to create AKS cluster using Azure Portal.
Prerequisite
- Basic knowledge on navigating Azure Portal
- Azure subscription (even free one will work)
- Lastly, passion to learn AKS.
Create AKS Cluster Using Azure Portal
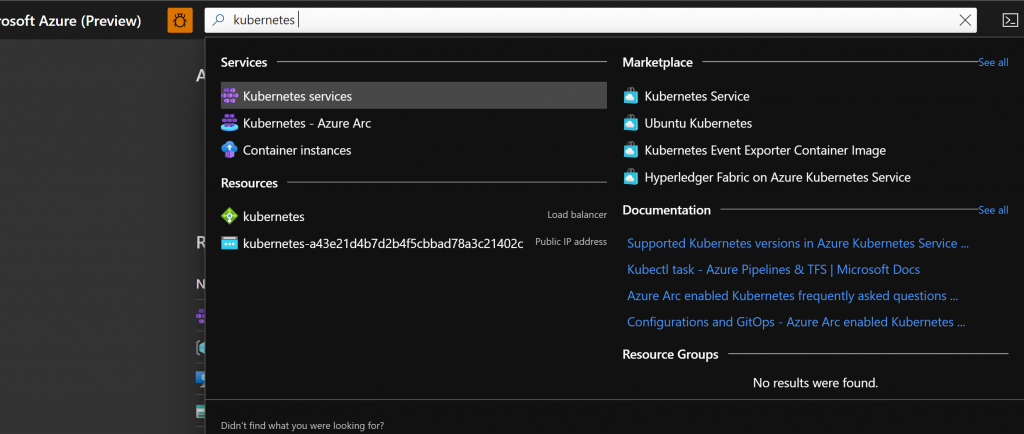
Open Azure Portal and search for Kubernetes. Select “Kubernetes Services“.
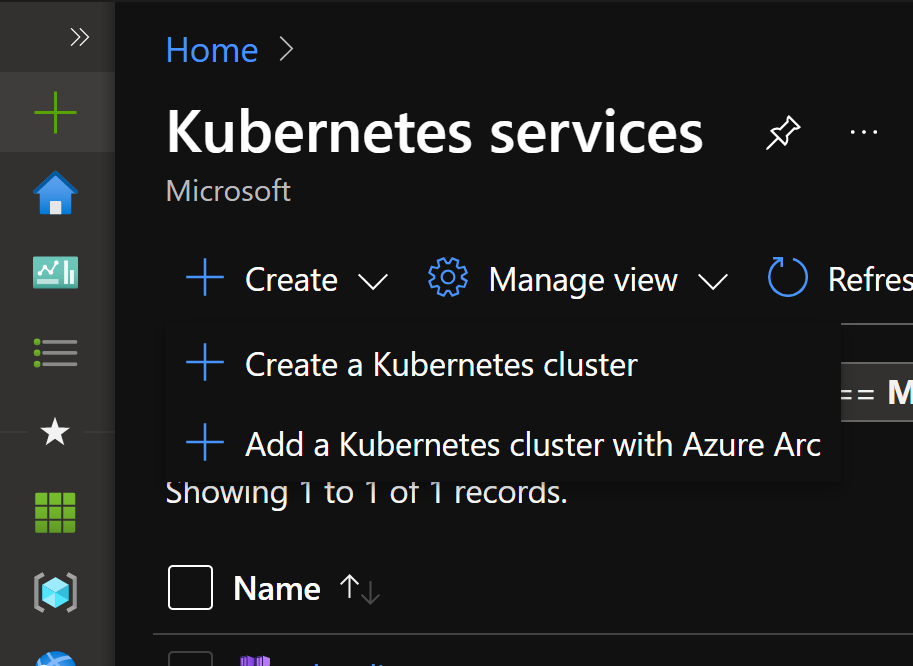
Click on “Create“. You would be presented with 2 options. Select “Create a Kubernetes cluster“.
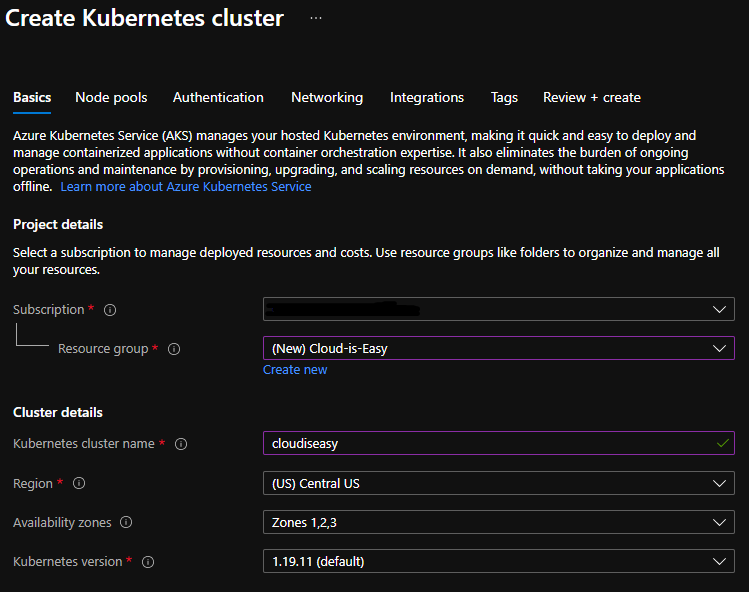
Fill the required fields. To create AKS cluster using Azure portal, you need to fill multiple sections (not all are mandatory and take default value if left unfilled). Here’s a quick description of what needs to be filled in each section.
Basic Cluster Details
- Subscription – Select the subscription you want to deploy the AKS cluster to.
- Resource Group – Select the resource group to use for cluster creation. If none exist, select “Create New”.
- Kubernetes cluster name – Name of the AKS cluster you want to create.
- Region – Region where you want to deploy this cluster in.
- Availability zones – To have high availability, you can deploy nodes across physical locations.
- Kubernetes version – Kubernetes you want to use. This version can always be upgraded even after the cluster is deployed.
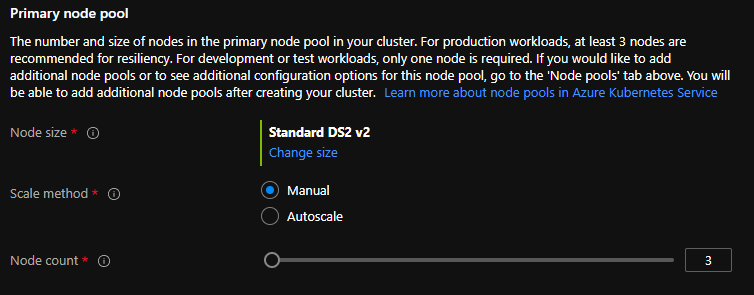
- Node size – This is the virtual machine SKU for the nodes. Once the cluster is created, you cannot change this.
- Scale Method – Whether you want to scale cluster Manually or use Autoscale. For production workloads, I would recommend going with autoscaling.
- Node Count – The number of nodes you want to create. Cluster can be resized even after deployment has completed.
Node Pool Details
You can create cluster after filling just the Basic details. However, I’ll cover all tabs to make sure you are aware of all possible options that can be used while creating AKS cluster from Azure portal. Feel free to skip this section if you want to jump straight to exploring the cluster itself.
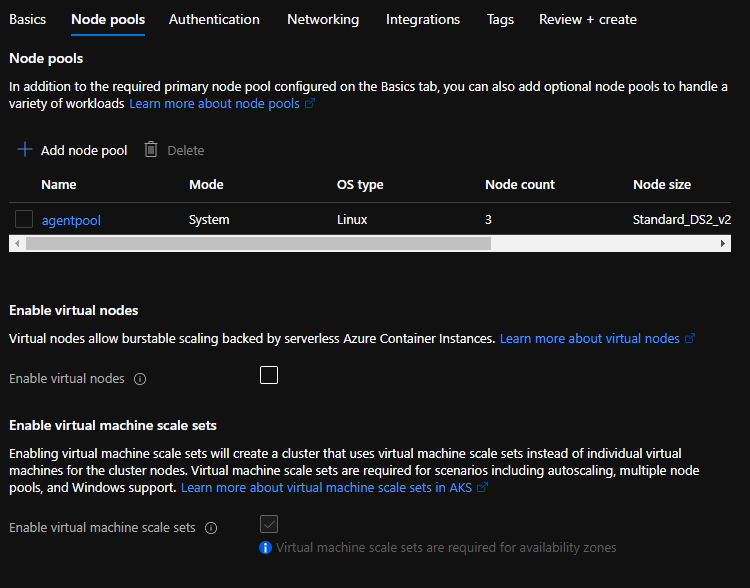
We have three subsections as part of Node pools.
- Node pools – You should see a node pool already present on the screen. How did come by default? You remember the details you filled in Basic form? Well it’s the same pool. However, if you need to create more node pools to support your application, you can create them here.
- Enable virtual nodes – Do you have Azure Container Instances (ACI) running on your cluster, and want to enable communication between the AKS cluster you’re creating and the ACI? Virtual nodes are here to help you. To use virtual nodes, your AKS should use Azure CNI (advanced networking) instead of default Kubenet. I will explain differences between Kubenet and Azure CNI in different post.
- Enable virtual machine scale sets – Name says it all! Also, don’t need to worry about this as it is selected by default and greyed out.
Authentication
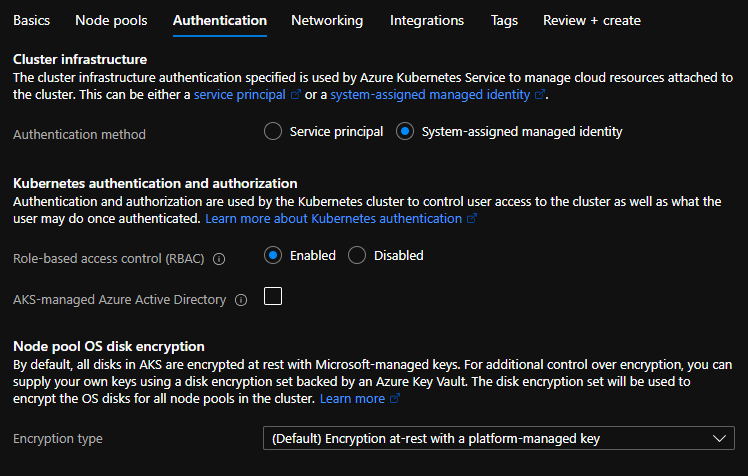
It again has three subsections. Lets go through them:
- Cluster infrastructure – You can select whether to use service principal or system identity to manage resources attached to the cluster.
- Kubernetes authentication and authorization – Manage user authentication and their respective authorizations here.
- RBAC – Enable it to allow fine grained access control on the resource.
- AKS-managed Azure Active Directory – You can easily integrate Azure AD using this option. However, beware of few limitations it comes along with.
- You cannot disable it once AKS cluster is created
- You cannot go back to legacy AAD.
- If you don’t enable RBAC, you cannot use AKS-managed Azure AD integration
- You can’t change the tenant associated with AKS-manged AAD integration.
- Node pool OS disk encryption
- Encryption at-rest with a platform managed key – Microsoft will manage encryption keys
- Encryption at-rest with a customer-managed key – You will manage encryption keys.
Networking
- Network configuration – Select whether you want to use Kubenet or Azure CNI. As show from below screenshot, Kubenet will create VNET automatically and assign default values. Azure CNI expects either to have a VNet to be in place or provide details to create one. CNI will allow you select your VNet with values you want to use. It also allow to select custom Kubernetes service address range, Kubernetes DNS IP and docker bridge address range.
- DNS name prefix – This will be used as the prefix for the DNS that will created once AKS cluster is deployed.
- Load Balancer – You can’t change it and have to use Stadard load balancer.
- Enable HTTP application routing – If you check this box, it will create an ingress controller within your AKS cluster. It also creates External-DNS controller to publicly expose application deployed to cluster. While creating AKS cluster for production purposes, do NOT use this option as this feature is not designed for production workloads.
- Enable private cluster – This option will create a cluster and make sure API server is accessible only from within a private network only. This is an option you would use while creating infrastructure for enterprise customers.
- Set authorized IP ranges – This option can be used to make your cluster more secure. Once checked you would asked to enter IP range. This will ensure that AKS cluster API server is accessible from only these IPs.
- Network policy – This option helps secure traffic between pods. There are three options available here:
- None – Doesn’t this word say enough? No policy would be imposed.
- Calico – Open-source network security solution. You can use Calico with either Azure CNI or Kubenet for Linux. You can’t use this with kubenet network configuration if using with Windows server. If you’re looking for advanced features like Global Network Policy, Global Network set and Host Endpoint, Calico is your go to option.
- Azure – Azure Network policies are supported only by Azure CNI. You can see that in my screenshot, it’s greyed out since I selected kubenet under network configurations.

Integrations
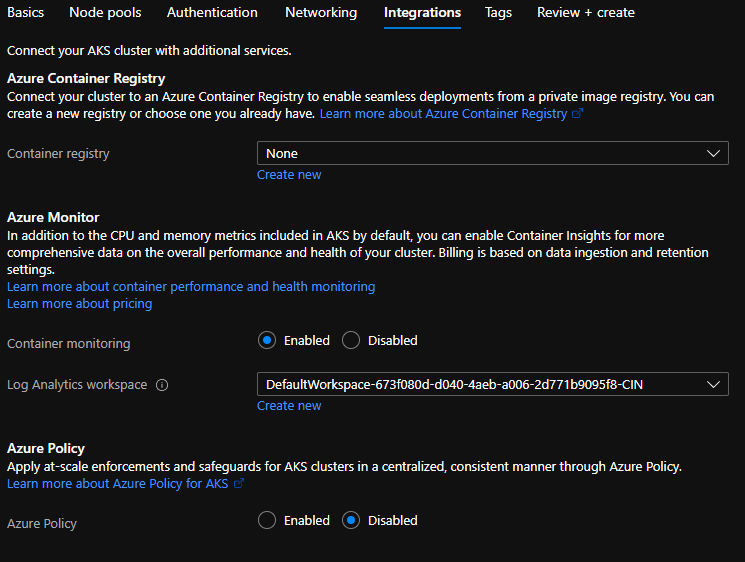
This section allows you to enable multiple integrations.
- Azure container registry – If you want to integrate Azure container registry select appropriate ACR. You can also create an ACR from here by clicking on “Create New”. Creating ACR and integration with AKS will be covered in further posts.
- Azure Monitor – This will allow you to enable container monitoring. You need to select appropriate log analytics workspace. If you don’t have one, create a new one. We will cover monitoring in detail, later in upcoming posts.
- Azure policy – It is an extension of Gatekeeper to apply at-scale enforcements and secure your AKS cluster in a centralized and consistent manner.
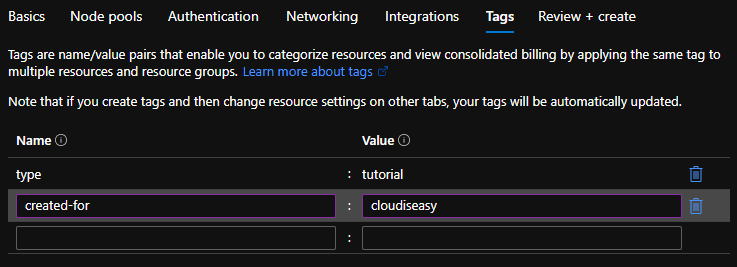
Tags
Tags are well known to anyone familiar with Azure portal. You can add relevant tags here.
Finally, review all options and click on “Create” button at bottom of the screen to create the AKS cluster.
Next Steps
By now, you should know how to create AKS cluster using Azure portal and also have a running cluster in your Azure environment. In next post, we will cover how to connect to AKS Cluster and run kubetcl commands from your local workstation/laptop.
If you have questions or queries, feel free to drop them in comments. I’ll try my best to answer all your queries.